This fire kit was auctioned off at the COEO Conference, September 2001, and bought by Sandee Sharpe. Thanks, Sandee, for supporting COEO!
The second kit, at the end, will be auctioned off at the 2003 COEO Conference.
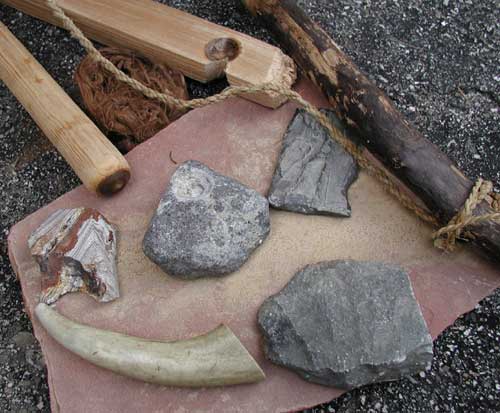
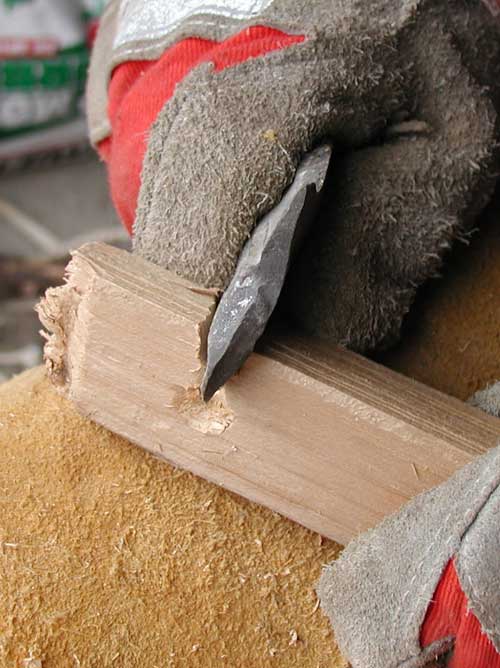
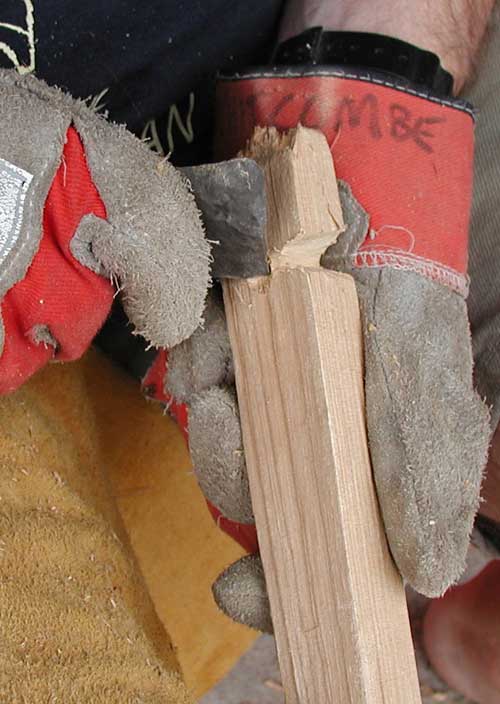
The hearth board and the spindle are from an old cedar fence rail, probably about 100 years old, which I got from an old fence at Sheldon. Using the stone wedge in the right foreground, I split the spindle off the hearth, so the spindle is, in effect, harder, because it is end-grain. The grain in the hearth is vertical, i.e., it runs up and down, so that when you are drilling down through the hearth board, you are constantly working against both hard and soft wood. (It’s hard to explain ... but it makes a significant difference.)
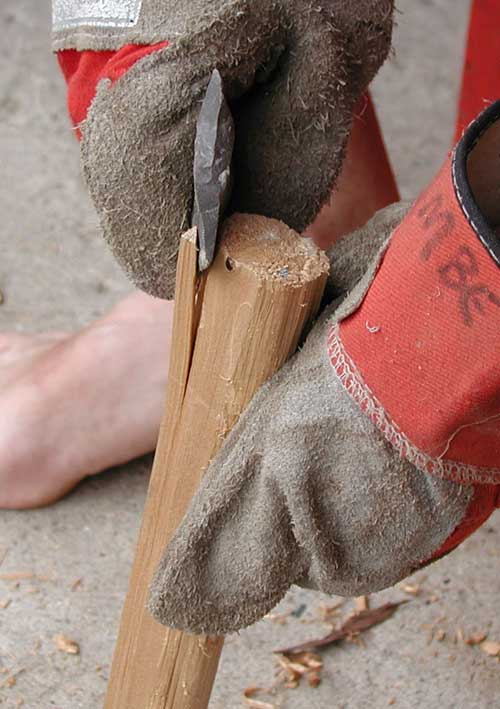
Since I am using straight-grained wood, splitting wood off the square corners resulting from the initial split from the hearth, is much faster and efficient than any other technique. This illustrates the principle that the careful choice of materials and techniques makes a huge difference in reducing the time and energy used, and in improving the quality of the finished product.

The edge of the chert tool that is against the wood is smooth and unworked. This means that the edge can be quite sharp, though not necessarily strong. Note the leather gloves and the leather leg pad.
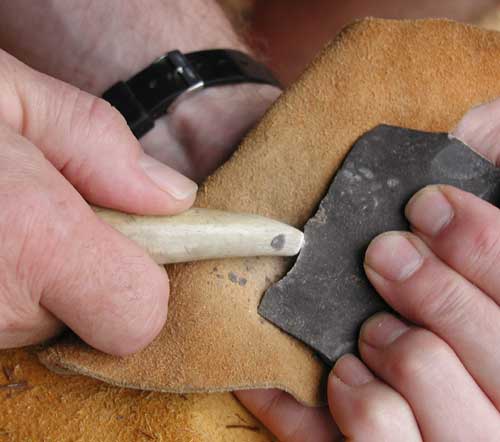
The flint tool is a piece of Onondaga chert from the north-east shore of Lake Erie. It’s a fine-grained thinnish flake, that I have worked unifacially, i.e., on one face of each edge only, so that the edges are chisel-shaped, not knife-edged. You can see the smooth un-worked surface facing you in this photo. This kind of edge is generally better for most aspects of woodworking. One corner of the tool is being unifacially worked here, to make curved surface, to turn it into a spokeshave, to round off the spindle. I used the deer antler time to work the chert. (And always, either leather pads, or leather work gloves — safety is important! We don’t have the lifelong practical learning to handle tools without protection.)
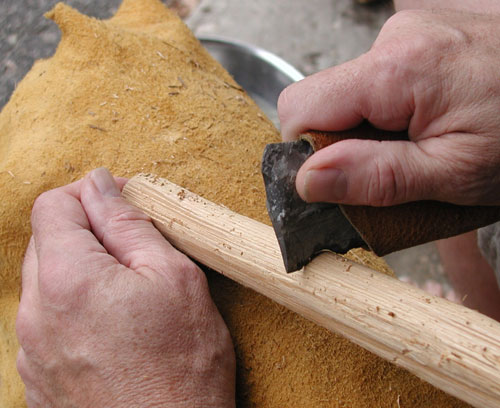
I am pushing the spokeshave away from me, so that any spalls or tiny flakes of chert worn off, generally preserve the shape of the tool.
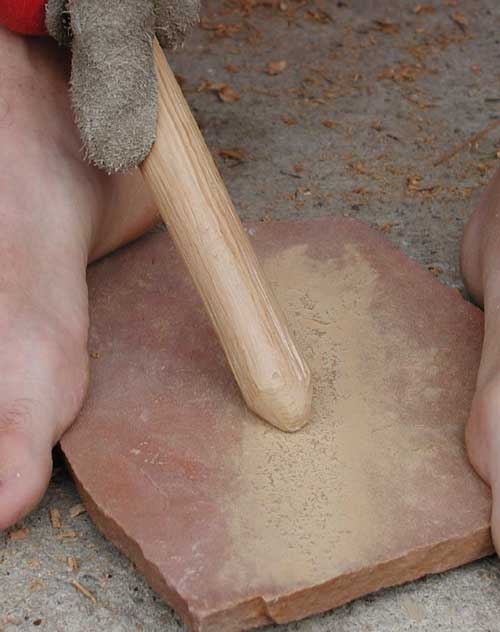
About as low-tech as possible! I used a coarse piece of sandstone to abrade the wood. (Concrete works well, too — but that’s too much like ‘cheating’!)
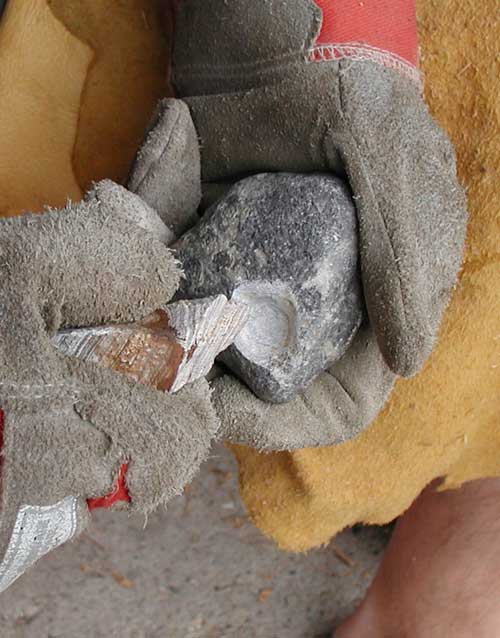
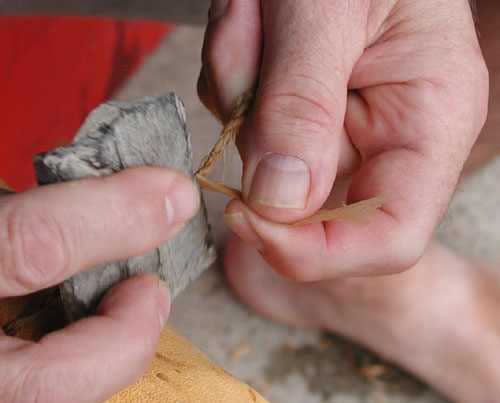
The socket rock is a piece of fairly fine-grained limestone. I chose this particular rock because it already had a large cavity in it, because of a brachiopod fossil. This made gouging out the hole much easier, using the hard chunk of Onondaga chert shaped like a large burin. The chert tool is actually from the weathered surface of a chunk of better quality chert from the north-east shore of Lake Erie. There’s nothing special about this gouge tool — other than that it is tough.
I’ve gouged out the beginning of a hole for the spindle, centring it about one-and-a-half spindle diameters from the edge of the hearth board. The notch itself is wider at the bottom than the top, and wider at the outside than in the centre of the hole. All of this is so that the ember will drop out easily without breaking apart.
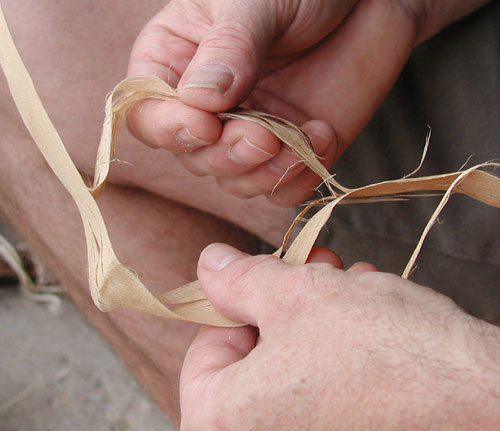
I have used twine made from the inner bark of basswood for the bowstring. This twine will not be durable enough — even though it’s strong enough to lift my 110 kgs. Leather thonging may not be as strong, but it’s much more resistant to the wear and tear of rubbing, so it would be the expected material. Today, I use braided drapery cord — much stronger and more durable even than leather. But this is an ‘authentic’ kit, and so I have made twine from the inner bark of basswood. I cut the bark off a small basswood tree (removed during trail maintenance), soak it (‘retting’) in the river for four weeks, separate and discard the outer bark, and then use the inner bark to make twine. Inner bark grows in annual layers just as does the wood, and separating the bark into thin layers gives much more control over the material.
Twining fibre in this ‘z-twist’ manner is a technique that humans have been using for tens of thousands of years. I am using the thigh-rolling technique here — the method generally used by women, since it’s much faster and more efficient than the alternative of finger-twisting. Huron families had fishing nets perhaps hundreds of metres long made of basswood twine, or their preferred wood-nettle.
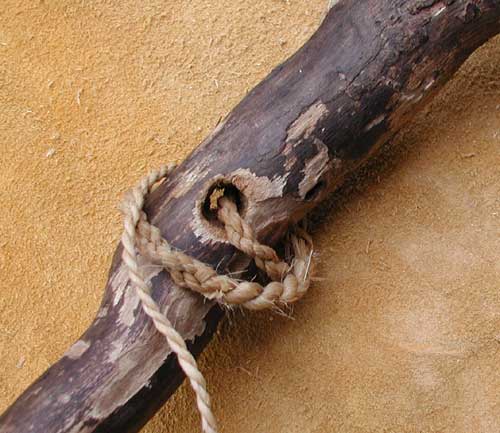
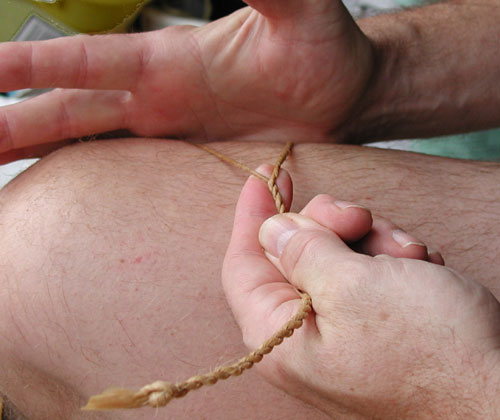
I used a thin stone drill to bore this hole through the handle end of the bow. You can see that the twine is of several thicknesses. The thick part is the central section that goes around the spindle. It is strong enough to support my whole weight of 110 kg. It is made from two pieces of z-twist twine, each again z-twisted against the other, to give a smoother and more even piece of twine than could be made from just a normal two-strand piece of twine. Boring a hole through the bow means that I have more control over the twine when it is wrapped around the spindle.
The bow is a piece of sumac — nothing special, except that it’s what I consider the right length (approximately 80-100 cm), curvature, and stiffness.
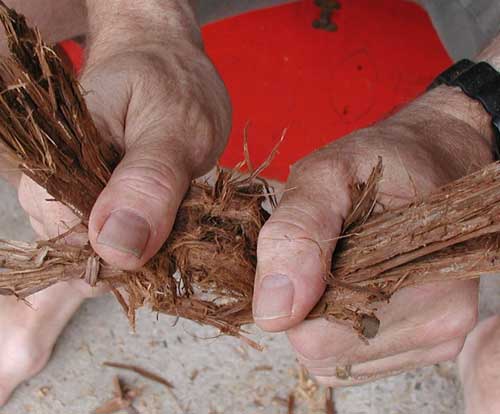
The most easily available material that I use for tinder is the inner bark of white cedar — the same tree that the wood for the hearth and spindle come from. Fresh cedar bark does not work at all for me. I have learned from experience that the cedar bark has to have been exposed to the elements for at least ten years. I pick off the woody outer bark, and then vigorously rub the inner bark between by hands until it’s the consistency of cotton batten.
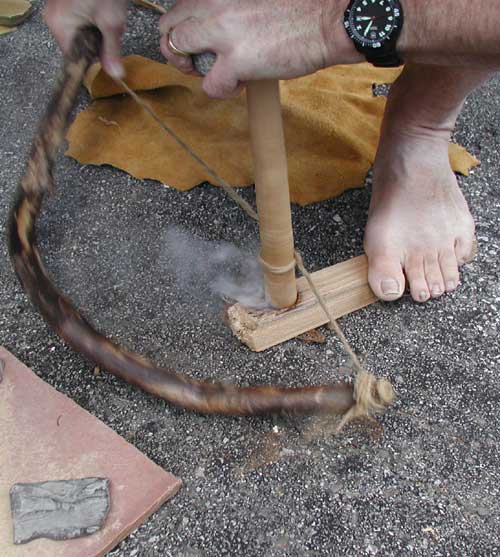
The technique I use is based on that of Ernest Thompson Seton in Two Little Savages. I use a stiff bow and a very taught string, and considerable down-pressure from the socket on the spindle — a strength-based technique. It takes me about 15 to 20 seconds to produce a suitable ember. When there is thick smoke pouring out of the hole, and black powder around the bottom of the spindle, and the notch is filled, then it’s time for the next step of gently knocking out the raw ember!
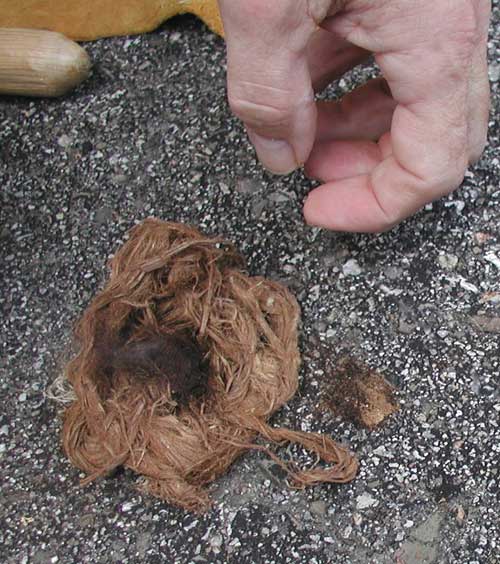
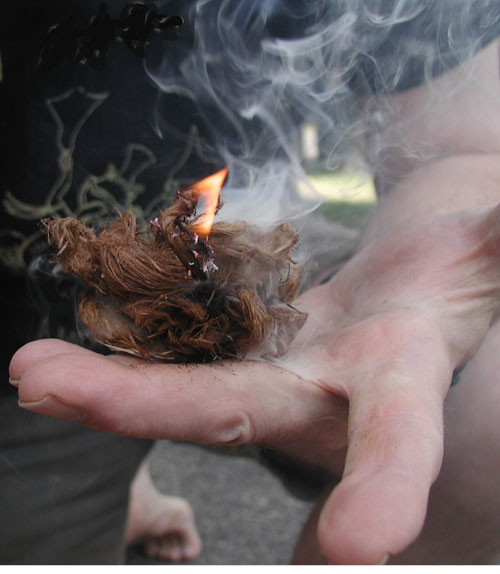
There is just a curl of smoke from a dark-brown or black ember that’s about the size of three or four peas together. I put the edge of the tinder under the hearth board, and gently knock the raw ember out when it’s ready. I then wrap it in the tinder and blow gently at first, then increasingly hard as more smoke is produced.
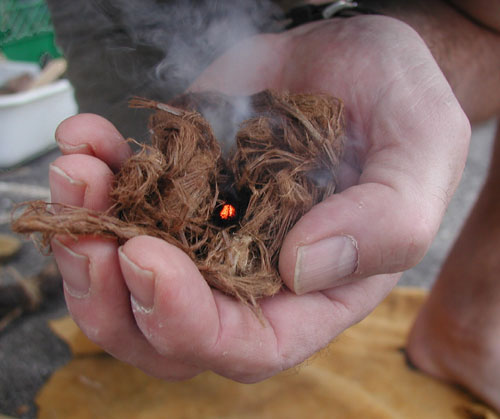
When I get to this stage of being able to see a glowing red ember, I know I’ve got fire! At this point, I can actually relax — in many cases, just wrapping the ember up in the tinder and letting it sit will eventually produce flame. But if I keep blowing ...
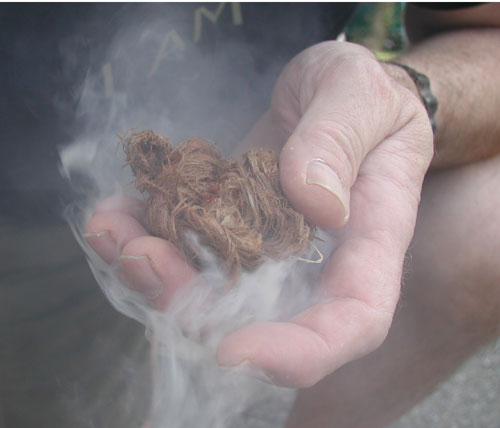
A couple of good puffs, and then it’s flames! I still get an amazing feeling every time!!!
The whole kit took less than three hours to finally pull together — though that really overlooks by far the most time-consuming aspect, the preparation of materials. In fact, preparation has two components, actually. The first is the selection of materials. The second is the actual preparation.
For example, the bow took only a few minutes to saw to the desired length using a simple rough flake of chert. Drilling the bow hole took perhaps another ten minutes, most of which was selecting and shaping the proper tool — which promptly broke as I neared the end of the task. (Disposable tools are an old invention!) But finding that bow piece in the first place took years — literally! This is only the third good bow I’ve found over twenty years of occasional looking.
The actual twisting of the bark into twine took about five minutes for each metre-long piece, and another five minutes to do the plying of the two pieces together to make the final rope. Then perhaps another ten minutes to make the additional end pieces that are added on to the ends of the rope to make it long enough to tie onto the bow efficiently. All of this assumes that the bark has been gathered and prepared to the point of actually being able to make the twine. That’s a process that occurs in another season, and another place (near the source of the fibre and near the river). It’s two half-days of rough and dirty work, one to cut and submerge the bark, and another very stinky day to take the retted bark and strip and clean it —but that produces a major supply of prepared bark. I perhaps used one percent of the material resulting from that day of earlier labour.
I’d selected the cedar rail much earlier, and cut it to rough lengths (using a modern bow saw, I admit). I pulled three good rails out of a pile of about a hundred, and discarded about a half of the three good rails because of lack of good straight grain as I cut them up into the desired length. (I could have done the full cutting using stone tools — it would have added about a half an hour to the total task.) In reality, I’d have taken more time to find a more suitable piece of wood that would’t have required as much preparation. Time spent selecting the proper material is almost always more efficient, especially if that selection takes place over time.
This socket stone is a fine example of the value of careful selection of materials. Other sockets I’ve prepared with stone tools have taken several hours of very laborious work gouging and drilling with hard stone tools to dig a deep enough socket hole. This stone with its preformed fossil hole required only about ten minutes of quite light work to enlarge the shoulders of the hole. (Interestingly, since the hole is off at one edge of this stone, I had to adapt my technique of holding the stone, shifting from centring it in my palm where I normally hold sockets, to focusing the pressure on the heel of my hand as mandated by this particular stone.)
Shaping the spindle took perhaps half an hour, divided between various abrading and sanding tasks using the piece of rough sandstone, and a perhaps five minutes of planing and another ten minutes of work with the spokeshave. Just making the spokeshave took five minutes, plus another few minutes doing occasional touch-up to the tool to adjust the curvature and smoothness of the edge.
Sawing the notch took perhaps five minutes — mostly because the tool was very good.
Shredding the cedar bark into tinder took at most a couple of minutes. Again, I had the material at hand, having found a source of the bark over the years, and simply going back to the source when I run out of stored bark.
One of the other fires kits that I’ve made using stone tools took about ten minutes work to make the hearth and spindle. For that I had carefully chosen a piece of cottonwood root that was just a fairly thin stick. I split it in half, and used one half for the hearth, and roughly shaped the other piece into a short spindle. The kit was so small as to last me only about ten fires — but it demonstrated for me how quickly a kit could be made with materials at hand.
People living ‘in the land’ would not have likely been concerned with matters of time, for many reasons, but most importantly perhaps because they distributed efforts over time. Out hunting, they might well notice a good fire bow shape, or a fine source of bark for tinder, or a particularly good socket rock. They might gather the material then and there, or they might store that knowledge in their mental map of the landscape — which map must be so much more complex than we can fully understand, mostly because we use the landscape for so few things, and therefore have such a limited narrowly-dimensional view of it.
The issues of skill and knowledge are quite difficult for us to understand as well. Selecting, modifying, and using stone tools would have been second nature to them — common sense — whereas we have to think through these steps very carefully, or risk blundering along using the limited techniques we are familiar with, instead of having ready access to a much wider range of more efficient techniques. Take the use of a flat rock to abrade the spindle. It was a student of mine, totally frustrated with slow laborious planing and spoke-shaving, who showed me that by forcefully rubbing the spindle on concrete, she could achieve much more efficient results.
For me, this whole exercise of making a fire kit using stone tools gives me what I think of as significant insights into the lifestyle of a person living ‘in the land’ — a much fuller understanding of their relationship to the environment around them. The value for me is not in producing the flame, though that’s a wonderful feeling. It’s in more directly understanding how fully our ancestors had to integrate all aspects of their existence in order to live.
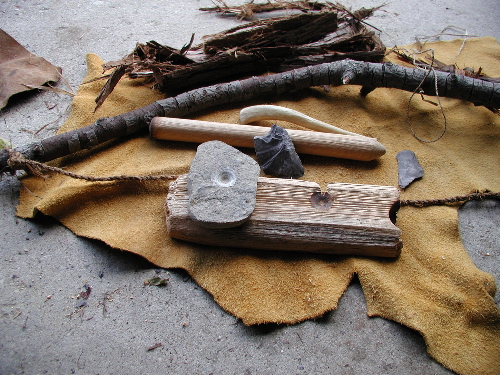
A second fire kit, including the associated stone tools.
E-mail me at: markwhitcombe34 at gmail dot com
updated 2003 October 01